How do you put on eyelashes? 8 foolproof Beauty Panel tips for applying falsies and the best lashes to try
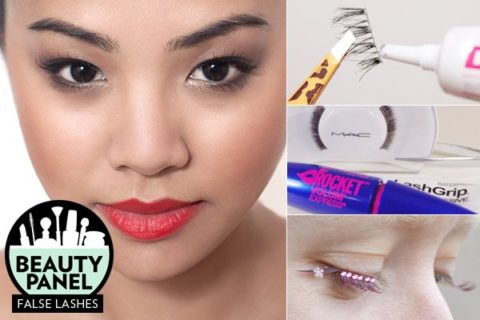

Figuring out how to put on eyelashes can be a tricky process. From finding the best false lashes for your face to mastering the application technique, there’s an almost infinite number of variables that can trip you up along the way. But despite all this, there’s no denying the added wow-factor that false lashes can provide. A good tube of mascara can only go so far: false lashes are certainly the best way to add volume, definition and drama to your look.
Whether you’re applying eyelashes for the first time or consider yourself an expert at falsies, tips and tricks to make the process easier are always appreciated. Which is why we asked our Beauty Panel to share how they apply false eyelashes. Even better, their tried-and-true answers include recommendations for some of the best false eyelash brands to try.
Challenge 6: How do you put on eyelashes and what are the best false lashes to try? See the answers now! »
When it comes to tips for applying false lashes, THISWASFOREVER’s Emily Chan offers a great suggestion for newbies: cut the lash into two. The smaller lash is much easier to handle and will look more natural when you apply it—making the transition from not wearing to wearing false eyelashes seem much more seamless. Tess Lopez, of Makeup By Tess, also suggests measuring false eyelashes before you apply any glue. If they extend beyond the edge of your eye, simply trim the ends to the perfect size.
An eyelash curler is another trick to ensure your false lashes look natural against your real eyelashes. Stylish & Literate’s Aleeza Agno suggests curling your own lashes before you apply the falsies and then curling again, after they’re glued on. And Janella Panchamsingh, from Bold N Beautiful Makeup uses a false lash applicator to squeeze and bond her false lashes to her natural lashline. Ready to find out how to put on eyelashes? Read on for all the Beauty Panel answers.
Have a beauty question you want to see the panel answer? Send it our way at [email protected]. Read on for the answers to this week’s challenge and for more goodness, get to know all contributors on our Beauty Panel hub page.
Jump to: ALEXA LOWE | ALEEZA AGNO | ANDREA VICTORY-LACASSE | DEE THOMSON | EMILY CHAN | JANELLA PANCHAMSINGH | SANDRA D SOBON | TESS LOPEZ
Aleeza Agno
Toronto | Stylish & Literate
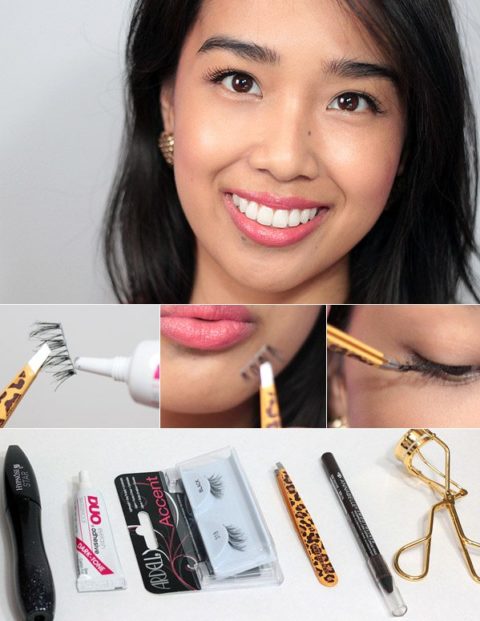
False eyelashes come in many different shapes, sizes, and styles. They are a quick and easy way to make your eyes pop, especially if you aren’t blessed with naturally lush lashes.
For a natural, everyday look, I like to use an “accent” lash. Accent lashes are shorter than a regular strip lash and are used on the outer corners of the eyes. They add volume and definition to your lashes while still looking natural. My favourite is the Ardell Accent Lash in “#318” because the faux lashes crisscross to mimic real lashes.
Aside from the lashes, the second most important component is the lash glue. My favourite is the Duo Eyelash Adhesive in “Dark-tone.” It keeps your falsies in place throughout the day, but it’s also easy to remove at the end of the night. I especially love the dark version because it blends in against my naturally dark lashes.
Before I apply falsies, I like to curl my lashes and coat them with mascara. Then I apply the adhesive to the lashes and wait a few seconds for the glue to get tacky (patience is key, the lashes will adhere much better). Using tweezers, I place the falsies as close to the lash line as possible. Once the falsies are secure, I often curl my lashes again before applying eyeliner. This will define your eyes and masquerade any gaps between the falsies and your real lashes.
Products used: Ardell Accent Lash in “#318,” Duo Eyelash Adhesive in “Dark-Tone,” Annabelle Smoothliner in “Brown,” Lancôme Hypnose Star Mascara, Shu Uemura Eyelash Curler, M.A.C Blush in “Peaches,” M.A.C Lipstick in “Crosswires”
Emily Chan
Toronto | THISWASFOREVER
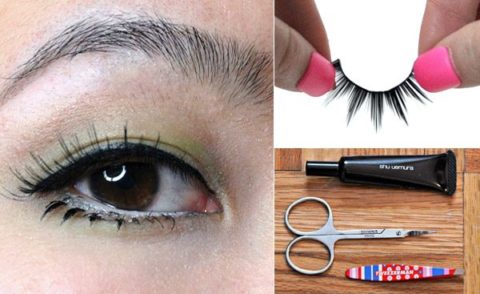
If your eyes are the windows to your soul, then your eyelashes are definitely the draperies that enhances them. Unfortunately, I naturally have very short and stubby lashes that look the same even with multiple coats of mascara. Thus, you can probably imagine how reliant I have become on my falsies over the years. Aside from my foundation, I cannot live without my false lashes. If it’s your first time applying false lashes or if you are just a beginner, there are four simple suggestions that I can offer:
1. Invest in a good eyelash adhesive! I have tried quite my share of eyelash glues and I always end up going back to this one by Shu Uemura. It’s the only one that I can rely on to not budge for the entire day. Yes, it’s a bit pricey but I guarantee that you’ll not regret it when your lashes stay in place all day long. Plus, a tube of this can last me for a long time. It applies white but dries clear.
2. After applying a layer of glue to your false lashes, make sure you wait around 10 seconds for the glue to dry a little. This will ensure that the lashes will apply to your lid without any problems and it will cut down the time it’ll take for the lashes to adhere to your lids. You can hold them with a small pair of tweezers to secure them.
3. While your glue is drying you should bend your full set of lashes a little bit in order for it to fit nicely to the shape of your eye. (Refer to the photo) Sometimes I find that the bands of the lashes can become stiff over time. Therefore, bending them will loosen them a bit to ensure that the do not peel out during the day.
4. Lastly, though it’s more time consuming, you can cut the falsies in half to create two pieces and then apply them separately. I like using a small pair of curved scissors for this because it allows you to cut closer to each strand of hair. This is a really neat trick for beginners because you’ll have more control over where the pieces are being placed.
Products used: Shu Uemura Lash Adhesive, Tweezerman x Cynthia Rowley Tweezers, Small curved scissors
Alexa Lowe
Montreal | Stealing Beauty
Products used: Essence Liquid Liner, Duo Waterproof Eyelash Adhesive in “Dark-tone,” Quo Full Lashes in “804,” Lancôme tweezers, Revlon eyelash curler, Maybelline Great Lash Lots of Lashes Mascara
Tess Lopez
Toronto | Makeup By Tess
I can understand why putting on lashes can be a terrifying process. Glue close to your eyes? Yuck! The possibility of having spider-looking-things hanging down your cheeks as you dance the night away? Not flattering!
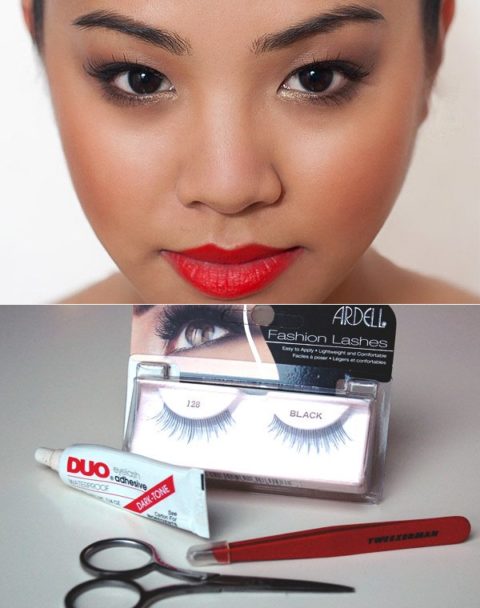
My ultimate favourite false lashes are by Ardell. They are 100% human hair, lightweight and reusable. The ones with the invisible lash band are most ideal as they look very natural. My usual go-to is “#110” and my new found fave is “#128.” Both give length to the lashes and the perfect amount of volume—just enough added oomph to enhance your eyes and make you feel beautiful.
Here are a few of my helpful, non-messy tips to enhance those fluttering lashes of yours:
– For beginners, try appling only half a strip of lashes instead of a full strip. To do this, simply cut the lash band in half. It’s an easier application and if you apply the half-lashes to the outer corner of your eyes, you can still achieve the sultry, cat-eye look.
– Before applying your false lashes, measure them. Ensure they don’t go past the outer corner of your eyes as it can give the illusion of droopy eyes. Then cut the lash band to the correct length.
– When applying the false lashes, use waterproof glue. My favourite is Duo Eyelash Adhesive. QUO has a latex-free glue for those allergic to latex.
– To avoid the messy glue application, put a bit of glue on the back of your hand. After 30 seconds, use a toothpick and dip it into the lash glue and then apply it to the base of the lash band. This will help avoid the huge globs of glue that sometimes come out when you apply it directly from the tube.
– Add a bit more glue to both ends of the lash band for added security.
– When applying your lashes, stick the lash band to the centre of your natural lash line. You can use tweezers if it’s easier. Then adjust both ends of the lash band to fit it into place. Push the outer corner of the lashes up to give your eyes a lift. This will help open up the eyes.
– As the glue is drying, look down. Don’t close your eyes! You don’t want the glue to smoosh onto your lower lash line and make it feel like you glued your eyes shut.
– Once the glue has dried (I suggest applying the rest of your makeup while you wait) apply a black or dark brown liquid, cream, or gel liner to the base of your lash line. This will hide the lash band as well as any imperfections to make your false lashes look like your own.
– Add mascara if needed. Mascara will help fuse both your natural lashes and the false lashes together to make them indistinguishable.
Va va va voom! You are now ready to bat those lashes! Just remember to avoid rubbing your eyes!
Products used: Ardell Fashion Lashes in “#128,” Duo Eyelash Adhesive in “Dark-Tone,” Tweezerman Tweezers, Eyebrow Scissors
Janella Panchamsingh
Toronto | Bold n Beautiful Makeup
Products used: Make Up For Ever Lash Glue, Red Cherry #117 lashes
Andrea Victory-LaCasse
Toronto | Shop Pretty
The best tip for applying false lashes is patience; give yourself enough time to get it right. Also, the best way to tell if your false lashes are on properly is that you can’t really feel them. You may feel the weight on top of your regular lashes, but should feel no poking, lashes stuck together, or irritation.
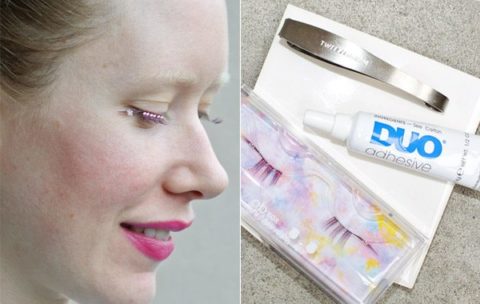
For this post, I used the limited edition Ob for Shu Uemura Sakura Flower Mini False Eyelashes—Shu Uemura is my favourite brand of false lashes to wear. I also like to have the Tweezerman Corner Lash Curler handy to make the application easier. And when it comes to glue, I’ve used a lot of different lash glues, sometimes even the glue that comes with, but I prefer Duo above all.
1. Sit Down
Sit down to apply your false lashes. Leaning over the bathroom sink with an overhead light can be really frustrating. I find that sitting at a table with a standing mirror, or a hand mirror laid flat on the table and bright lighting from a window or multi-directional sources is the best scenario.
2. Line It Up
First, measure the lashes, I used a mini set—which goes from the outer corner to the centre—so measuring and cutting wasn’t necessary, but with a full set, place it along your lash-line from the inner corner to the outer and measure if some may need to be snipped off the end. Then trim to fit (not on your eye, keep the scissors away)! Once you’ve got this done, hold each false lash gently at each end, and bend the strip to loosen it up. This will help to curve the lash to the shape of your lid.
3. Wait Until the Glue is Ready
Squeeze a little dot of glue onto the back of your hand. It’s tempting to go right ahead, but wait a moment until it feels a little tacky and then apply along the back of the strip of lashes.
4. Just Do It!
Apply the strip as close as you can to the lash-line, I like to use both hands, making sure all of the glue is touching the skin, then slide the false set down as close to your lash-line by squeezing it with the corner tweezers starting from the outer corner and moving along toward the centre with the corner curler. You want to be grabbing both your own lashes and the false set. (You can also use slanted tweezers here, but be careful! The Tweezerman Corner Curler I use is more gentle and I’m a fan of not having sharp metal close to my eyeball).
5. Repeat On the Other Side.
Do the same for the other eye.mYou may need another dab of glue if the one you’ve been using is a little too dry. Remember, if it isn’t turning out right, you can always pull the lash off, pulling from the outer corner to the centre, roll the glue off and start again.
I chose not to wear any other makeup, keeping the lashes cute and simple and matching with my lip colour. If you use liquid liner, apply after the lashes are set and comfortable. Like anything, practice makes perfect. The more often you apply lashes the better you will become, so take your time and realize it’s a tricky feat—but you can do it!
Products used: Tweezerman Corner Lash Curler, Ob for Shu Uemura Sakura Flower Mini False Eyelashes, Duo Striplash Adhesive in White/Clear
Sandra D. Sobon
Toronto | Moms Makeup Stash
Step 1: Open and Check Fit
To remove your lashes from their package, gently peel the lashes off of the tray using your fingers or a pair of tweezers. Be careful not to damage the delicate band. Lashes come in all sorts of sizes, so to ensure proper fit and get an idea of placement, lay the lash on top of your natural lash. If it extends longer than your eyelid, you may need to trim off any excess from the sides.
TIP: Never trim the actual length of the lashes. It makes the tips look blunt and very unnatural. Also, with some styles, make sure that you recognize the difference between left and right lashes, making sure to apply the shorter ends towards the inner corner of the eyes.
Step 2: Apply Adhesive to the Lash Strip
There are a number of ways that you can do this. Some like to squeeze a line of adhesive directly onto the lash strip. Others like to apply the adhesive to a cotton swab or toothpick and glide it across the lash strip. I prefer to apply a bit of the adhesive to the back of my non-dominant hand and working quickly, gently run the outer seam of the strip along the glue until the entire strip has a thin layer of adhesive on it. I then go back and apply a bit more adhesive to both ends.
Step 3: Wait
This is where many people make a critical mistake. It is so important that you allow the glue to “get tacky,” so make sure you wait 45 seconds or so before applying your lashes. While I wait for the glue to set, I like holding the lash strip in a slightly bent position. (i.e. U shape) This helps keep both of the ends from coming up on either side when the lashes are applied and makes the strip less stiff to work with, helping it mold better to a curved eye.
Step 4: Apply and Secure Lash Strip in Place
Tilting my head back slightly, I place the lash as close to my natural lash line as possible, making sure that they are lined up with the start of my natural lashes. Do not place false lashes too close to your tear duct—there should be a space there. I use a pair of tweezers to securely hold onto the lash strip in the centre, close to the band but not touching the glue. I find that tweezers provide more precision as opposed to using my fingers. I lay down the end first, then the middle and lastly the front. I then gently press along the lash band to secure it all in place. While the glue is still tacky, you can make any adjustments quickly if necessary.
TIP: When applying the strip, bring it down from above rather than coming in from the front.
Step 5: Let Dry and Touch Up Liner/Mascara
Once you’ve placed both lash strips, wait patiently for 1-2 minutes while the adhesive dries completely. I usually go back and touch up my eye liner at this point. I use liquid or gel liner to help conceal any visible seams and fill in any gaps. I then apply my mascara to mesh my lashes and the falsies together.
TIP: Applying mascara to just the root allows false lashes to keep their feathery look
TIP: If you plan to reuse your lashes, apply mascara to your natural lashes only.
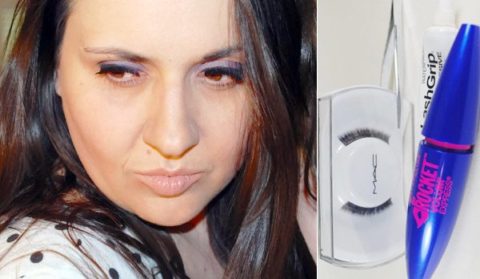
Products used: Bobbi Brown Creamy Concealer in “Beige,” Dior Skin Nude BB Creme in “002,” M.A.C Paint Pot in “Half-Wild,” MAC Eyeshadow in “Purple Haze,” “Nocturnelle,” “Scene” and “Carbon,” Physicians Formula Custom Eye Enhancing Gel/Cream Liner. Maybelline The Rocket Volum’ Express, Essence Lipstick in “#52 In The Nude” M.A.C False Lashes in “#46,” Ardell Professional Waterproof Lash Grip Eyelash Adhesive in “Dark”

Dee Thomson
Toronto | Liner and Glitter and Gloss, Oh My!
False lashes can be one of the toughest beauty tricks to master, but when you are able to apply them properly they can make a world of difference to your look. First up, you have to decide what type of lashes you want to apply: full, flares or quarters. I’ve personally become a fan of quarter lashes, like the Bourjois set that I applied here. I find that they are quite easy to apply and give off more of a cat-eye look, which I love. Here are my tips for a foolproof falsie application:
– If using a full set, make sure they fit your lashes first. Don’t be afraid to trim to a size that fits your lid!
– Before application, give the lashes a little bit of a curve. You want them to smoothly fit the natural curve of your lid and they won’t be able to do this properly if they are too stiff.
– To make sure the lashes really stick, apply some of the glue to your hand in a line. Dip the end of the lashes in the glue and wait about 15 seconds so that the glue gets tacky, then line them up as close to the lash line as possible (I like to use tweezers for this—I feel that they give better control). Once you have them lined up where you want them, apply a little pressure to make them stay in place.
– Give the glue a few minutes to completely dry, then apply two coats of mascara to blend the falsies in and to give your natural lashes more volume.
False lashes are the perfect way to amp up your look for a night out or when you just feel like pulling a Kim Kardashian. These tips will help you rock them with ease so you can look and feel totally glam.
Product used: L’Oréal Paris Colour Riche Eye Shadow in “933 Cookies & Cream,” Urban Decay 24/7 Glide-On Eye Pencil in “Zero,” Bourjois Easy False Eyelashes Mini Fringes, DiorShow Iconic Overcurl Mascara

