Best braids: 5 Beauty Panel-approved hairstyles to try this holiday season

With the holiday party circuit reaching its fever pitch this weekend, a girl can run out of festive hairstyle options pretty quickly. And given the time crunch between now and December 25, we’re betting you wouldn’t mind putting down the blow dryer and curling iron for an evening. Enter the braided hairstyle: with endless variations (ranging from cute and casual to off-the-charts impressive) and possibilities for all skill levels, it only makes sense to work a braid into your holiday beauty routine.
To help you generate some ideas for your next braided hairstyle, we turned to the Beauty Panel. They shared their best braided looks and helpful tips that’ll make it easy for you to duplicate the looks with ease.
Challenge 41: What’s your go-to braided hairstyle? See the answers now! »
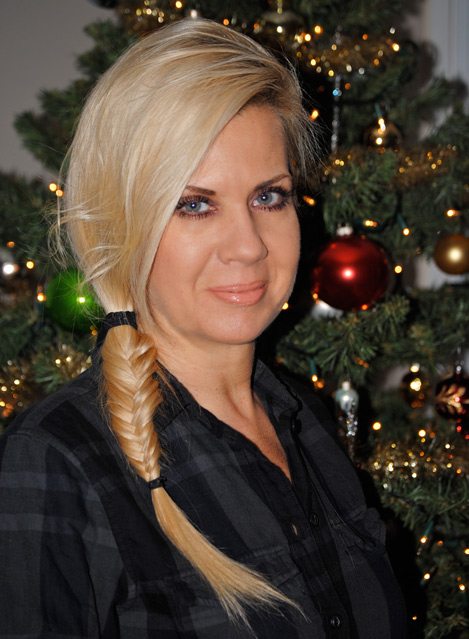
Eugenia Ragas of Ommorphia Beauty Bar emulates Balmain Spring 2013 with a ponytail that transitions into a fishtail braid, finished off with a festive black ribbon instead of the usual hair tie. Laurelle Alexandra of Paint Me Pretty gives us the details on her headband braid, which is made simple with a few bobby pins. And when Jennifer Francis of Spiced Beauty wants to try an edgy hairstyle, she uses a neat and tight braid to achieve that side-shaved look without the commitment.
Have a beauty question you want to see the panel answer? Send it our way at [email protected]. Read on for the answers to this week’s challenge and for more goodness, get to know all contributors on our Beauty Panel hub page.
Jump to: EUGENIA RAGAS | JENNIFER FRANCIS | LAURELLE ALEXANDRA | MAGGIE NG | STEPHANIE LAU |
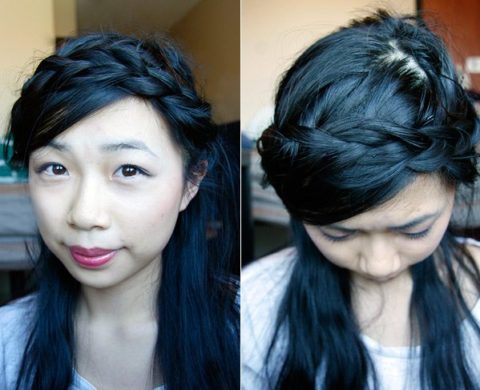
Stephanie Lau
Toronto | Fun Size Beauty
As someone with long hair, styling can often be tedious. Braids are a quick and easy way to look chic without much effort. My current braid of choice is the half-up, half down Dutch halo braid. The only difference between a Dutch Braid and a “traditional” braid is that you place the outer strands of hair underneath the middle.
As with anything else, practice makes perfect. There are millions of hair tutorials on YouTube for simple to complex braided hairdos, all you have to do is try. Here are a few tips and tricks to help you get started:
1. Texture is your BFF. Hair is less slippery and more workable if it’s curled or wavy. If you don’t have time to whip out the hot tools, try a dry shampoo, tousling spray, volumizing mousse or sea salt spray to texturize your hair.
2. Pull your hair flat against your head in the direction you’re braiding. This helps to avoid awkward clumps.
3. Messy isn’t always bad. Tight, sleek braids can often look stiff. Loosen up your braids and pull out a few strands for a perfectly imperfect hairstyle. If you’re having an Alfalfa moment, you can always combat flyaways of your hairstyle with a flexible hold hairspray.
Products Used: Herbal Essences “Tousle Me Softly” Tousling Spray and Vidal Sassoon “Repair & Finish Spray”
Eugenia Ragas
Montreal | Ommorphia Beauty Bar
Sometimes when I get stuck in a hair rut and don’t feel like going through the effort of creating an elaborate style, I turn to a tried and true favourite: a braid. But not just any braid, a fishtail braid! Super simple to create, yet looks like you needed two sets of hands to get it all together, it gives your look a nice touch of nostalgia, but in a totally updated way. Another bonus to this braided style is that being a bit messy is key – forget being symmetrical and instead embrace your tousled side!
One thing to keep in mind when sporting a braid is you don’t want to wind up looking juvenile. The best way to avoid that is to rough up the rest of your look—go a little heavier with your eye makeup and leave everything else fairly neutral, thereby providing a nice balance (and contrast) overall.
Maggie Ng
Toronto | Beauty PhD
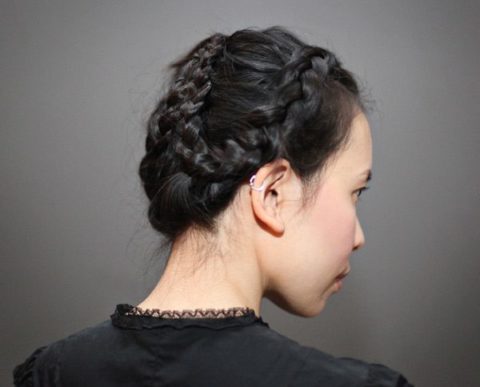
For this Dutch braid, I prepped my hair with a little bit of mousse. Combed out any tangles or knots. I then sprayed a bit of hairspray and teased the roots of my hair for a little bit of volume. With a side part, I braided one side at a time with a Dutch braid and secured with a small elastic band when I reached the end of my hair length.
A Dutch braid is essentially an inverted French Braid, but instead of placing strands over each other, they are placed under each other.
Not sure how to “Dutch Braid”? Separate three strands. Right strand crosses “under” center strand. Left strand now crosses “under” center strand. Keep repeating pattern while grabbing extra hair from each side adding to the existing strand.
Once each side was done, I grabbed the ends of the braids up into a U shape and secured with bobby pins. If you have a lot of hair, feel free to create a bun. I made sure to tuck the ends of my hair under the braids, so you can’t see them as much.
Products Used : Aveda Phomollient “Styling Foam”, Cricket Carbon Comb, Agadir Argan Oil Spritz Styling Spray in “Extra Firm Hold”.
Laurelle Alexandra
Toronto | Paint Me Pretty
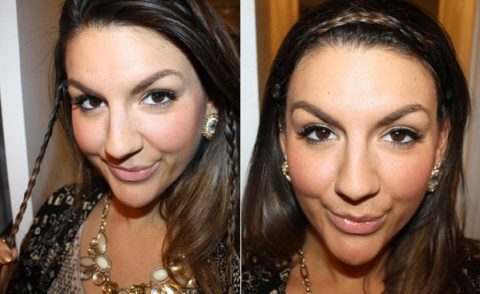
I really love the look of a braided headband. You can buy headbands that are the same colour of your hair that look like braids. But why buy one, when you can create it yourself? To create my braided headband look I made two braids on either side of my head, right above the ear. I then crisscrossed them around the top of my head and bobby pinned them on each side. I made sure to place the bobby pins in a position so you could not see them. Voila! There you have it, your very own braided headband! It also looks great if you have the ombré effect in your hair, it really adds a nice contrast with the light and the dark in the braid!
Jennifer Francis
Durham | Spiced Beauty
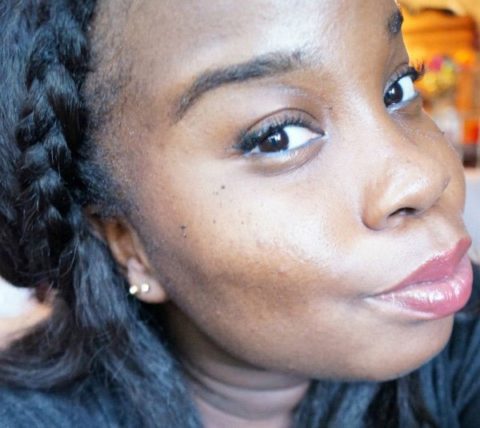
Oh braids. We’ve had a love/hate relationship for over 20 years. I would have never known that in my late 20s it would be one of my favourite go-to styles. Braids are the perfect style for every occasion. I’m even thinking about wearing one on my wedding day! Right now I have two favourite braid styles. It’s either two braids at each side or braids at one side and curls on the other.
My braid must-haves:
-Hair oil or gel
-Water
-Wide tooth comb
Comb out the knots if any. I wet my hair for some grip. Then add oil or gel (your choice) to keep the style and reduce frizz.
TIP: If you like the shaved side look but are afraid to shave the side of your head, try braiding one side for a similar look.
Products used: Jamaican Castor Oil, Water

